How to Install the XPS 13 (9360) Hackintosh in macOS Mojave
Updated
This is a definitive guide on installing the Dell XPS 13 (9360) Hackintosh in macOS Mojave. I go over what you need for it to run flawlessly.
Intro
There was a time when I was curious about which operating system would best suit my laptop?
In most cases, slapping Linux would do the trick on my machine, but how would the user experience change if I would have had the chance to use exclusive apps?
After 3 months of non-stop bickering with a well-written guide, I got macOS installed onto my Dell XPS.
But the reason why I did not stop there was because of minor issues I ran into.
By putting more time into resolving each bug, I am glad to say that I have perfected the installation!
FAQs
- Which Dell laptops will this guide work on?: This only works on the 9360 model (and possibly the 9350, according to users who've managed to make it work on theirs). For any other model, unfortunately, you have to consult other resources.
- Mine reboots, gets stuck, and/or not working overall. Why?: I've recently made many updates to my guide. Most devices will have minor modifications based on their specs, but results may vary.
- I'm not sure which settings to use in my
config.plistfile. Which ones are important?: I'll upload a working example of aconfig.plistfile that offers my build. I used the Macbook Pro 15,2 hardware configuration (Note: I used this for macOS 10.14.4, so be cautious if it's another version). - How do I update my device?: I highly do not recommend this for anyone, especially if you are a beginner. Having an updated Hackintosh is difficult to maintain. Disable all automatic updates. It is best practices to stay at your current version for long-term support use.
- Does this guide still work?: I will not be using macOS for now, but I will still provide support for others if possible. My workstation preferences have changed to Ubuntu. I created this guide for myself when I needed to use macOS temporarily. If the installation is a success at your end, then I congratulate you. If not, then skim through Remove Hackintosh and Reinstall Windows/Linux, which is found below this page.
Laptop Specs
- CPU: Intel i7-8550u
- Memory: 8GB
- Display: 1080p
- Disk: NVME SSD (256GB)
- Wifi Chip: Killer 1535 (needs to be swapped with the DW1560 card by using a T5 Screwdriver)
Firmware details
Whats great
- The device features that you need work (wifi, bluetooth, lid-wake, thunderbolt, headphones, first-party software, etc.)
Whats NOT great
- Laptop bottom gets somewhat warm easily, but it won't affect battery life and performance (check intel power gadget - watt usage is low)
Resources
Commands
Prepare the USB flash drive
sudo /Applications/Install\ macOS\ Mojave.app/Contents/Resources/createinstallmedia --volume /Volumes/Testy --nointeraction && say "Mark has helped you create a macOS disk, and it is done"
format NVME drive to 4k byte sector
sudo apt update
sudo apt install smartmontools nvme-cli
sudo smartctl -a /dev/nvme0n1
sudo nvme format -l 1 /dev/nvme0n1
hacked BIOS variables (depending on screen resolution for variable 0x785, 1080p = 0x04 and 1440p = 0x06)
setup_var 0x4de 0x00
setup_var 0x785 0x04
setup_var 0x786 0x03
Post-Install (applies to all devices)
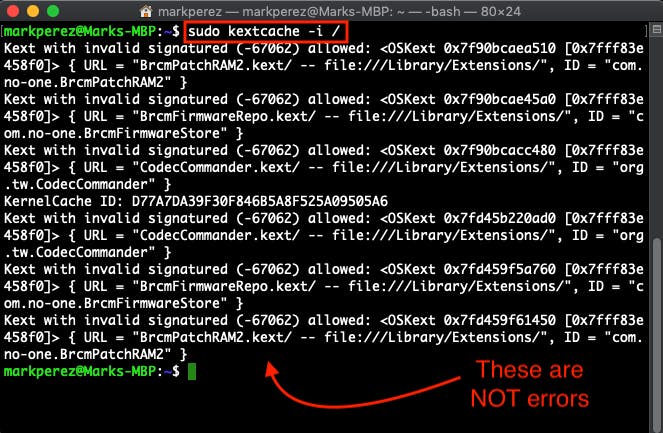
sudo touch /Library/Extensions
sudo chmod -R 755 /Library/Extensions
sudo chown -R root:wheel /Library/Extensions
sudo kextcache -i /
Configure sleep functionality
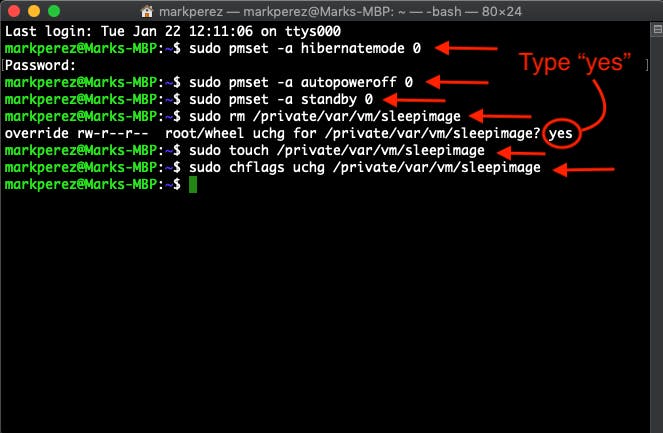
sudo pmset -a hibernatemode 0
sudo pmset -a autopoweroff 0
sudo pmset -a standby 0
sudo rm /private/var/vm/sleepimage
sudo touch /private/var/vm/sleepimage
sudo chflags uchg /private/var/vm/sleepimage
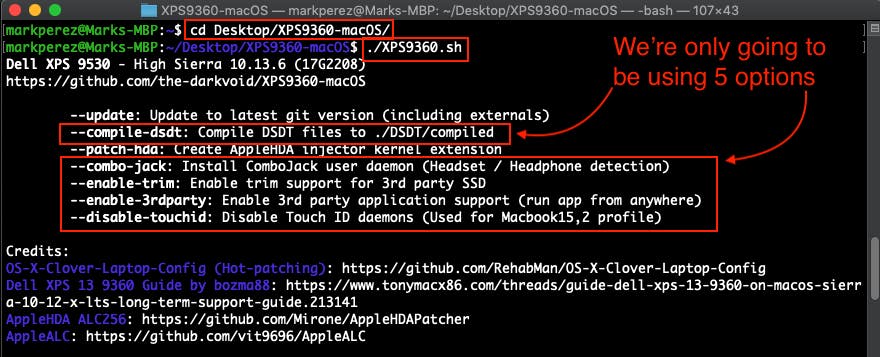
Darkvoid's XPS9360.sh script (credit goes to him)
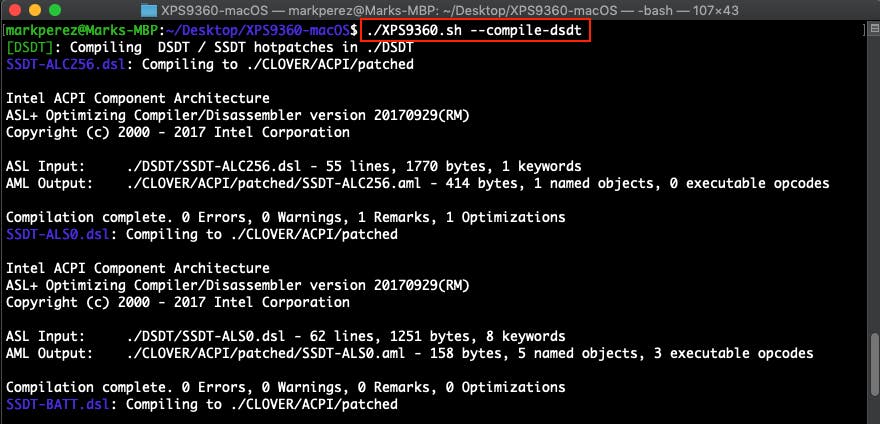
./XPS9360.sh --compile-dsdt
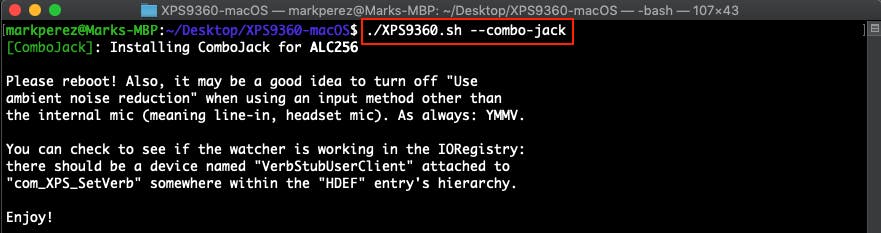
./XPS9360.sh --combo-jack
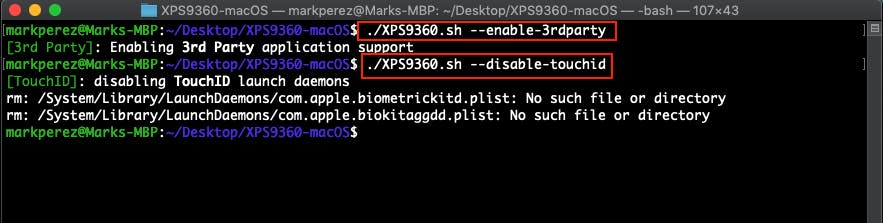
./XPS9360.sh --enable-3rdparty
./XPS9360.sh --disable-touchid
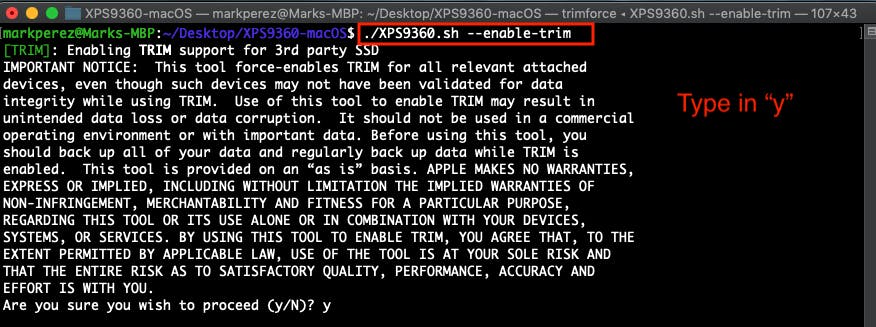
./XPS9360.sh --enable-trim
Update: Make sleep work
1. Mount your EFI partition of your SSD
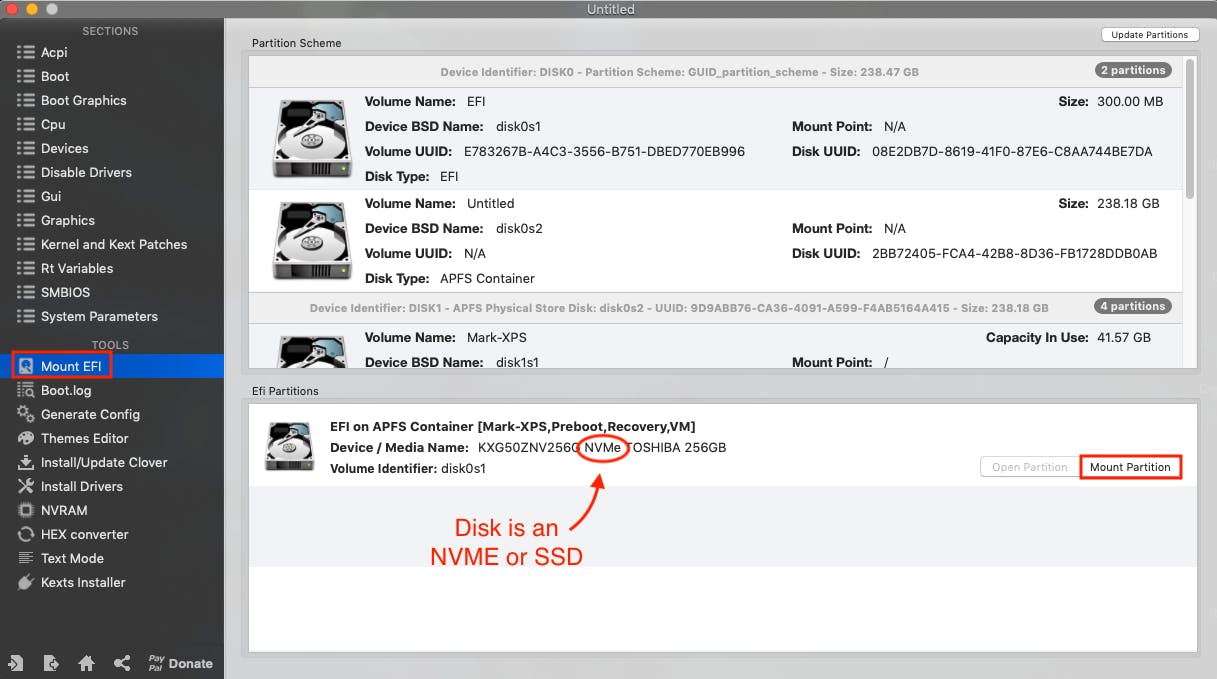
2. Go to (EFI - CLOVER - Other), and delete VoodooHDA.kext (Make sure AppleALC.kext is there)

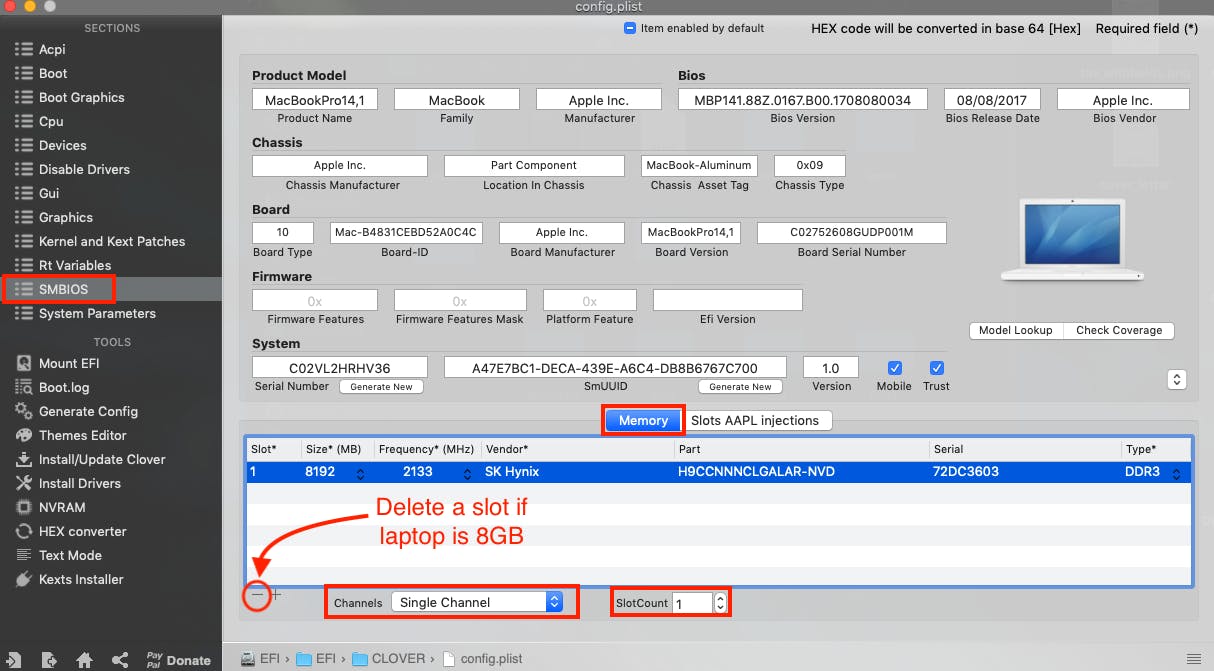
3. Go to (EFI - CLOVER), and open the config.plist. Click on SMBIOS, and adjust the memory to the amount of RAM you actually have. I have one slot of 8GB so (remove slot, Single Channel, SlotCount=1)
4. Click on Boot, and under a section called Custom Flags, add the argument alcid=56 (Save & Exit when finished)

5. Paste sleep commands
6. Execute command sudo kextcache -i /, and reboot
Update: Optimize the system entirely
1. Open the terminal. Change directory into Darkvoid's XPS9360-macOS folder. To see the commands, type in ./XPS9360.sh
2. To get your own DSDT files, execute ./XPS9360.sh --compile-dsdt
3. To make the headphones work, execute ./XPS9360.sh --combo-jack
4. To enable 3rd-party apps, execute ./XPS9360.sh --enable-3rdparty. To disable the touchID (since it's useless), execute ./XPS9360.sh --disable-touchid
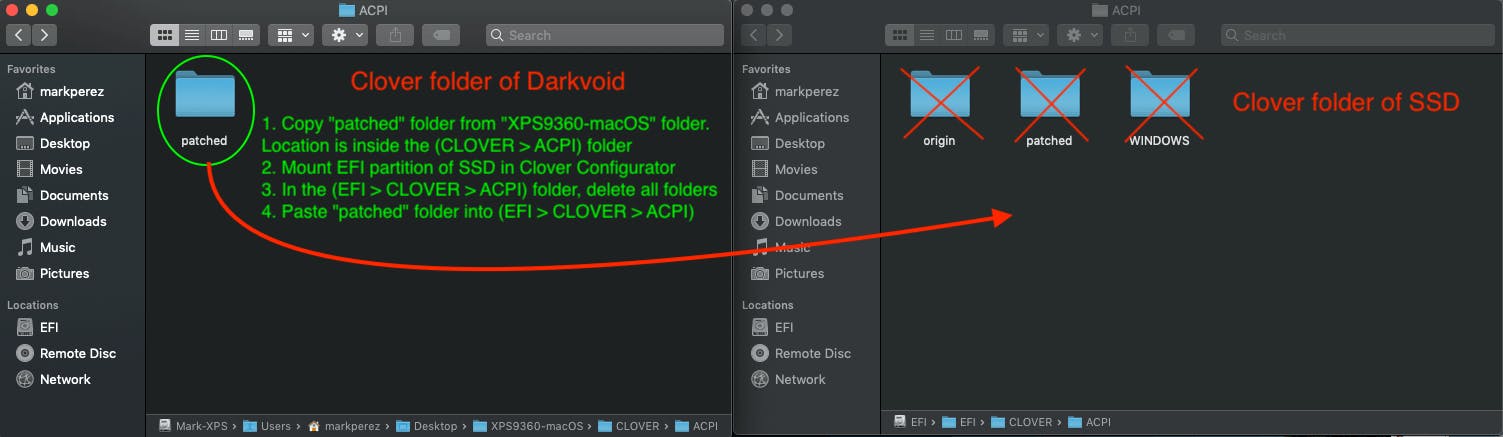
5. This is going to be somewhat difficult so bear with me (perform actions below in order).
- Copy
patchedfolder fromXPS9360-macOSfolder. Location is at (CLOVER - ACPI) - Mount EFI of SSD in Clover Configurator
- In the (EFI - CLOVER - ACPI) folder, delete all folders
- Paste
patchedfolder into (EFI - CLOVER - ACPI) - Lastly, run
sudo kextcache -i /
6. Finally, to enable TRIM support, execute ./XPS9360.sh --enable-trim. The warning on the screen is a bit exaggerated. Just type in y and the machine should reboot.
Remove Hackintosh and Reinstall Windows/Linux
If you want to install your previous OS, you only need to do 3 tasks.
1. Revert all of the EFI Variables to 0x01.
setup_var 0x4de 0x01
setup_var 0x785 0x01
setup_var 0x786 0x01
2. Reformat disk to the 512-byte sector.
sudo nvme format -l 0 /dev/nvme0n1
3. Reset BIOS Settings by choosing BIOS Defaults.
Conclusion
You're all set.
After doing everything above, you'll have a well-optimized Dell XPS that will function like real hardware of the MacBook Pro!